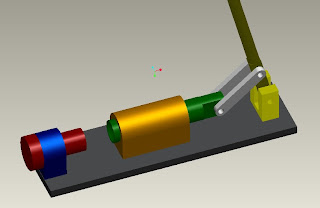
In this tutorial, we will be assembling all the parts that we have been modeling and creating using Proe since the tutorial "Nutcracker Modelling & Assembly **5** - part #1" until the tutorial "Nutcracker Modelling & Assembly **5** - part #8". So kindly, before you proceed in this tutorial make sure that you have created all the parts and that you followed all the videos in these tutorials to model all the parts correctly. The final assembly will be shown in the following figure and clip:

Here are the steps of the assembly:
- The Base is entered and mated with all the datums of the work screen.
- The Cylinder is entered is and mated with the base using its bottom surface and two diagonal holes.
- The Adjuster base is entered using the same technique used in step 2.
- The Adjuster is entered as a cylinder connection since it has two degrees of freedom (rotation and translation); its axis is aligned with the axis of the adjuster base and the lower surface of the adjuster is mated with surface of the adjuster base.
- The Hinge is entered, also using the same technique used in step 2.
- The Piston is entered as a cylinder connection since it has two degrees of freedom (rotation and translation); its axis is aligned with the axis of the cylinder.
- The Handle is entered as a pin joint since it has only one degree of freedom (only rotation); its lower pin hole is joined with the hinge hole using the align option.
- The Connection is entered using two sets of connections; a pin joint for the hole that is connected with the handle and a cylinder joint for the hole that is connected with the piston.
The video for this tutorial is splitted into two parts due to its size :


No comments:
Post a Comment